
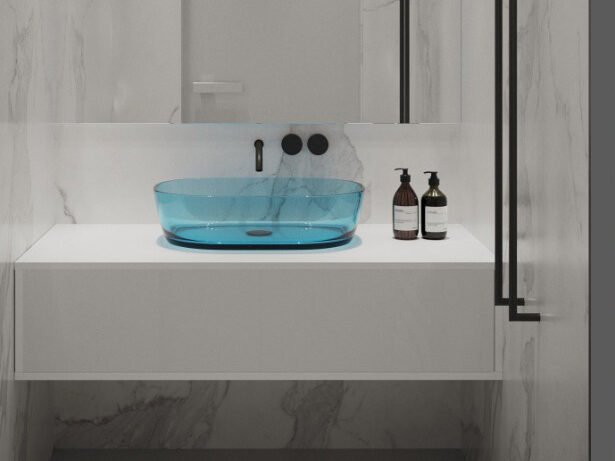
Transparent and translucent solid surface basins represent the pinnacle of modern bathroom design. Their crystal-clear or soft-glow appearance enhances any luxury environment, from hotel suites to minimalist homes. However, these beautiful materials demand delicate care — even the smallest scratch or haze can disrupt light transmission and reduce visual clarity.
The good news is that scratches on transparent solid surface basins are fully repairable. With proper techniques—cleaning, light sanding, transparent resin filling, and optical polishing—you can restore the basin’s clarity and brilliance without replacement.
This guide provides a professional, step-by-step overview for repairing and maintaining transparent, translucent, or clear resin basins, based on proven factory methods and solid surface restoration experience.
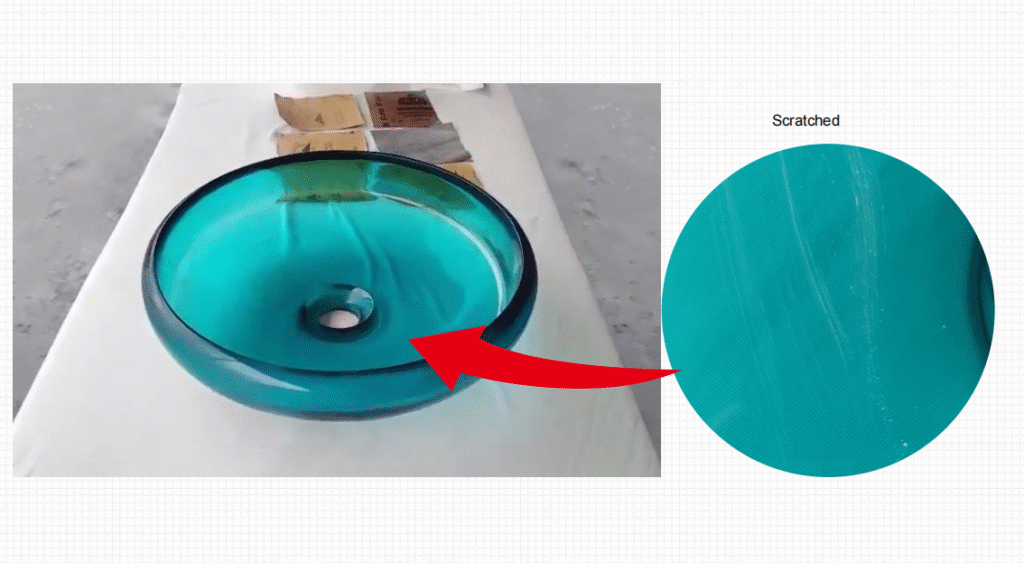
Why Scratches Are Highly Visible on Transparent or Translucent Basins
Transparent solid surface materials transmit and refract light differently from opaque ones. Even tiny imperfections bend or scatter light, creating foggy patches or fine white lines that catch the eye.
Common causes include:
- Friction from metal jewelry, rough sponges, or dropped accessories
- Abrasive cleaners leaving micro-marks on the surface
- Thermal stress or UV exposure causing micro-cracks or dullness
- Hard water particles scratching the resin during cleaning
- Improper storage or installation leading to minor abrasions before use
💡 Unlike ceramic or enamel, scratches in solid surface materials are not permanent — they can be refinished to full transparency.
Step-by-Step: How to Repair Scratches on Transparent Solid Surface Basins
1. Clean and Inspect the Basin
Wash the basin thoroughly with warm water and a neutral pH cleaner to remove residue or mineral deposits.
Dry the surface completely under strong lighting. Use side lighting or a flashlight to reveal subtle scratches and hazy zones.
2. Assess Scratch Depth
- Fine surface haze: Can be polished out directly.
- Moderate scratches: Require wet sanding and buffing.
- Deep scratches or chips: Need transparent resin filling before restoration.
Accurate assessment avoids unnecessary sanding or uneven optical blending.
3. Prepare Tools and Materials
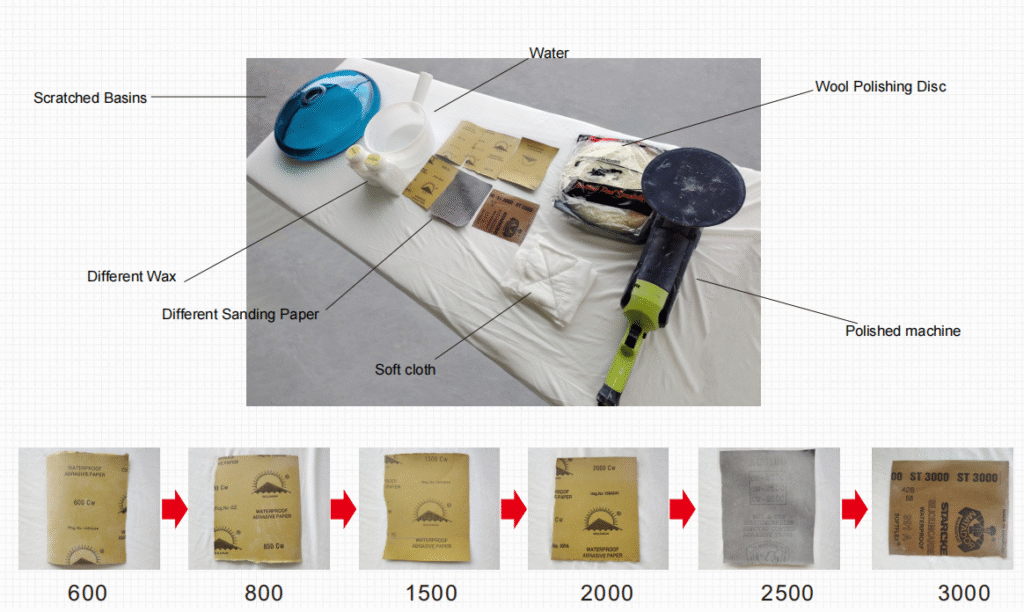
You will need:
- Fine-grit sandpapers (800 → 1200 → 2000 → 3000)
- A soft polishing pad or orbital buffer
- Transparent resin or UV-curable adhesive for deeper damage
- Resin-safe polishing compound
- Microfiber cloths and clean water
Keep all surfaces dust-free before beginning restoration.
4. Wet Sanding for Moderate Scratches
Soak the sandpaper in clean water. Begin with 800 grit, gently sanding the scratched area in circular motions.
Gradually move up to 2000–3000 grit for optical smoothness.
Keep the area wet to prevent heat buildup or “frosting.”
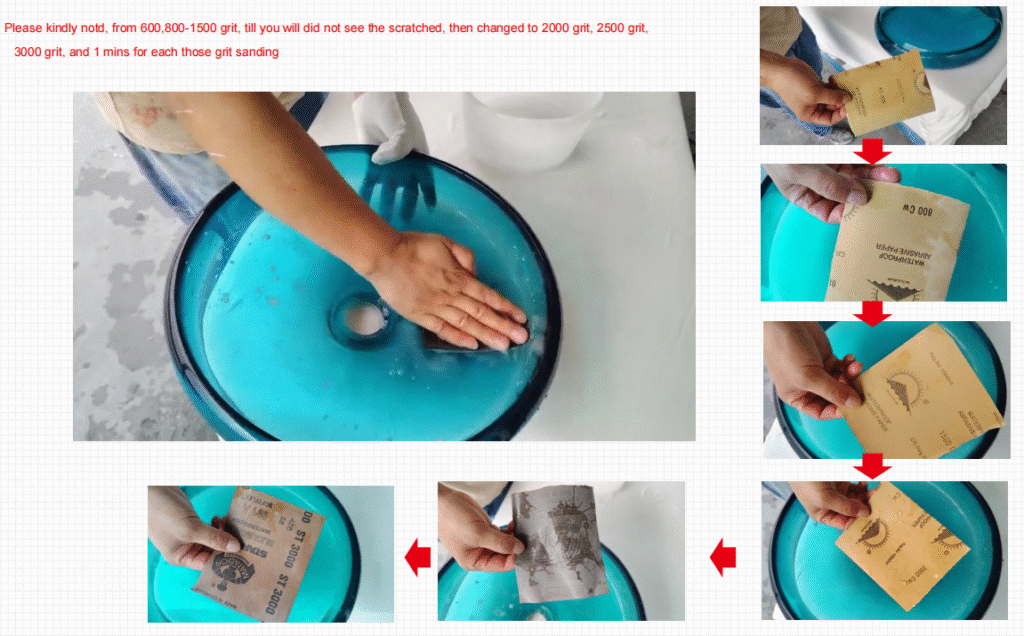
🔍 Always extend sanding slightly beyond the scratch to ensure even refraction when light passes through.
5. Filling Deep Scratches or Chips
For deeper lines or small cracks, apply a transparent repair resin compatible with solid surface materials.
- Clean and dry the area.
- Inject resin precisely into the scratch.
- Smooth with a scraper or plastic spatula.
- Allow full curing (via air or UV lamp).
Once hardened, wet-sand gently starting from 1000 grit and finishing at 3000.
⚠️ Always choose an optically clear adhesive with the same refractive index as your basin to prevent visible seams.
6. Polishing and Clarity Restoration
Apply a fine polishing compound with a soft cloth or orbital buffer.
Buff in overlapping circles with light pressure until the surface becomes crystal clear.
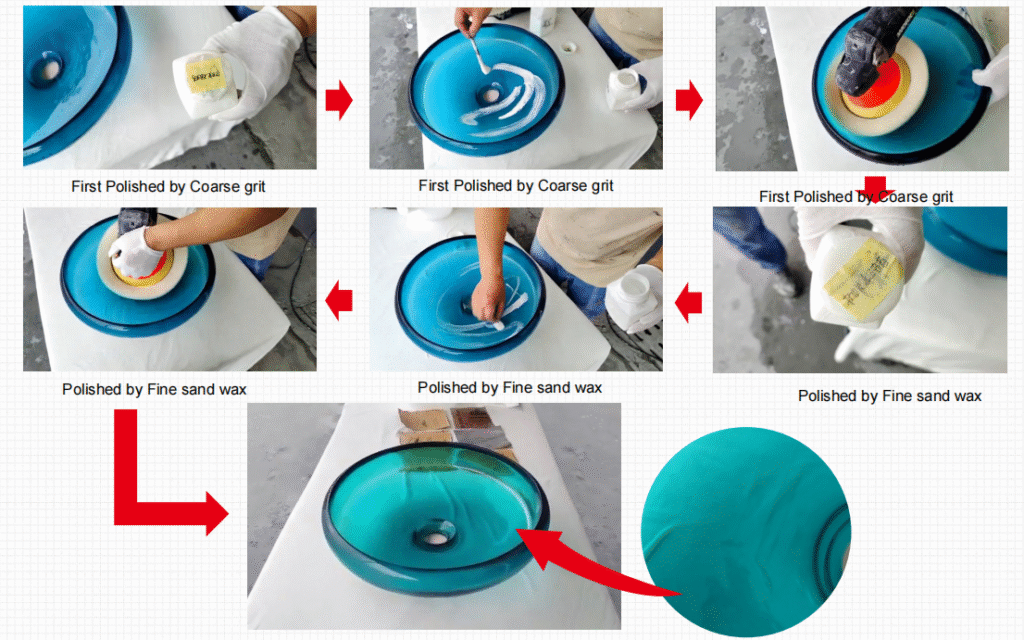
For translucent basins, focus on achieving even light diffusion rather than high gloss. Over-polishing can cause uneven reflection.
Wipe away residue with a microfiber cloth and inspect the finish under white light — the restored area should blend seamlessly with the original surface.
7. Final Cleaning and Optical Protection
Rinse the basin with clean water and wipe dry.
To reduce future micro-abrasions, apply a non-silicone protective coat or resin conditioner that maintains transparency without altering texture.
Avoid waxes or tinted polishes that might distort light or color balance.
Common Mistakes to Avoid
| Mistake | Result | Prevention |
|---|---|---|
| Using harsh scouring powders or metal sponges | Creates visible swirl marks | Use only microfiber cloths |
| Over-sanding one area | Causes uneven transparency or “halo” | Feather-blend evenly |
| Incorrect resin choice | Creates cloudy white patch | Use optically clear filler only |
| Excess polishing speed | Generates heat haze | Keep polishing speed and pressure low |
| Cleaning before curing | Weakens repair bond | Allow full resin hardening |
Routine Maintenance Tips for Transparent & Translucent Basins
- Clean weekly with warm water and mild soap.
- Wipe dry after each use to prevent mineral buildup.
- Avoid sharp metal objects or abrasive scrubbers.
- Do not use bleach or ammonia-based cleaners.
- Limit UV exposure by avoiding prolonged direct sunlight.
- Perform light polishing annually to refresh clarity.
- Repair micro-scratches early before they expand under pressure.
Because solid surface is renewable, your transparent basin can look brand-new even after years of use — simply refinish instead of replacing.
When to Consider Professional Restoration
For large, deep scratches or wide haze coverage, professional repair ensures optical consistency.
Certified solid surface technicians use multi-step sanding systems and resin-specific polishing compounds to restore up to 95–100% of original transparency.
Hotels, spas, and developers often schedule annual professional maintenance to preserve clarity across all basins in a project.
FAQ – Transparent Solid Surface Basin Care
Q1. Can I use toothpaste or baking soda for scratches?
No. These are abrasive and will cloud transparent surfaces. Use resin-specific polishing compounds instead.
Q2. How can I tell if my basin is solid surface or acrylic?
Solid surface feels denser and warmer to the touch; acrylic is thinner and more flexible. If unsure, consult your supplier before sanding or polishing.
Q3. Will sanding make my basin less transparent?
Not if done properly. Gradual wet sanding followed by fine polishing restores clarity — skipping grits or dry sanding causes haze.
Q4. What’s the best way to protect my clear basin?
Use a neutral cleaner, soft cloths, and apply a transparent surface conditioner periodically to prevent micro-abrasions.
Q5. What should I do if my basin turns slightly yellow?
Yellowing typically indicates UV exposure or heat aging. Contact your manufacturer — in many cases, professional re-polishing restores the original tone.
Conclusion
Transparent and translucent solid surface basins bring a sense of luxury, purity, and light to any bathroom design.
While they are more delicate to maintain than traditional sinks, their renewable nature makes them a lasting investment. With correct care — gentle cleaning, early scratch treatment, and proper polishing — these basins can maintain their crystal clarity for decades.
A scratch does not mean replacement; it’s simply an opportunity to restore perfection.
At KKR®, we specialize in advanced solid surface technology, including transparent and translucent bathroom basins engineered for durability, repairability, and design flexibility.
Whether you’re a contractor, designer, or hotel developer, our expert team provides professional surface restoration advice, material samples, and OEM customization.
✨ Bring back the brilliance of your bathroom design — contact KKR® today to request your transparent basin restoration or new project consultation.